There are some amazingly talented people out there, and they're nice enough to share their feats, and how they've conquered them with us.
Check out my top 10 favorite dessert blogs:
1. Baking and Books: I can't believe that this blog was once taken down. It has some of the most easy-to-follow recipes. It is also the blog that comes straight to the point the fastest.
2. Baking Obsession: Vera absolutely loves baking. In fact, it's her way to cheer herself up when down. She also decorates cakes. I'm always amazed at her creativity.
3. Foodbeam: Fanny was born to be a patissier. Not only is her blog adorable, but it's heartfelt. She has some great stories and great recipes.
4. Cannelle et Vanille: Going to Aran's blog is a nice break from a hard day. I just love to sit and scroll, scroll, scroll all day. She also has delightful stories that can just make your day.
5. Cookie Dough & Regret: Baking and Shame: This blog writer refers to herself as the ShamefulBaker. She has an unceasing amount of sarcastic and dark humor, and the precise attitude of a dedicated sweet toother.
6. Lemonpi: This blog is also full of engaging stories. The recipes she gives are extremely easy to follow and she provides powerful insight.
7. Goddess of Scrumptiousness: Jeannie Maristela blogs about food in general, let alone desserts. She's a chef by day, and blogger by night. Her advice will never let you down.
8. King Arthur Flour: This blog is run by the King Arthur Flour company itself. They post inspirational messages along with great recipes, encouraging people to push their limits and try their best. It's quite promising, really.
9. My Recipe File: This blog actually has a collection of great recipes gathered from different places. It also has food other than dessert.
10.The Bad Deal: This blog is all about finding good deals at restaurants. I've been saved many times from being ripped off thanks to the advice I get from here.
Got a craving for chocolate? This Chocolate Molten Lava Cake is the best way to relieve it. It turned out so well for me, that I had to share it. I got this batter for about $2.99, and it also came with a separate bag of chocolate chips.
Ingredients
4 oz. semi-sweet baking chocolate (You can also use chocolate chips)
3/4 cup butter
2 eggs
chocolate cake batter
Supplies
Oven
Microwave
Mixing spoon
Large Bowl
Cupcake tray or small bowls
Instructions
Pre-heat the oven to 425° F the preferred temperature indicated on the mixing box.
If your chocolate is in big blocks, break it apart to small pieces so it is easier to melt.
Put the butter into the bowl of chocolate and microwave for about 45 seconds.
4. Be careful with removing the bowl from the microwave, it'll be hot. Mix the melted butter and chocolate slowly until only the chocolate is visible, and the mixture has an even consistency.
Figure 2: After the chocolate and butter have come out of the microwave.
Figure 2.1: After thoroughly mixing the chocolate and butter.
5. Add the eggs and the cake batter into the chocolate and butter mix, and stir thoroughly until smooth.
Figure 3: Addition of 2 eggs and the cake batter.
Figure 3.1: After thoroughly mixing the above ingredients.
6. Spray canola oil onto the cupcake tray or small bowls generously.
7. Fill in the cupcake tray or small bowls with the batter, leaving only 1/4th space.
Figure 4: 1/4th of the space is left in the baking tray.
8. Put the tray/bowls into an oven, and bake for about 15 minutes, or the preferred time indicated on the mixing box. If you're using bowls, make sure you put them on top of a baking pan. 9. Wait about 15 minutes for the cakes to cool, and take out the tray/bowls from the oven.
Figure 5: Cooling the cakes.
Figure 5.1: Removal of the cakes from the oven.
10. Gently cut around the cakes with a flat knife. If you're using a cupcake tray, slightly push the cake against the wall of the tray, and pick it up.
If you're using a small bowl, simply put the plate on top of the bowl, and turn it upside down. The cake should fall on top of the plate.
Figure 6: After cutting around the cake.
Figure 6.1: Removal of the cake from the tray.
11. And voila! This should be served immediately, or else the chocolate inside will harden. As soon as you cut through the cake, the chocolate shouldooze out.
Figure 7: The chocolate should be oozing out.
12.To reheat, microwave for about 15 - 20 seconds.
Serving and Decorating
Figure 8: Chocolate Molten Lava Cake served with Ice Cream.
A little powdered sugar sprinkled on the top would make the dish look quite cheerful. Go for it!
You can never go wrong with fruit on the side. Try chopping up some strawberries in half, and garnishing around the cake. The chocolate would melt onto the strawberries. Yum!
Since this will be warm, the combination of ice cream with this would be absolutely delectable.
Really, you can do anything you please when it comes to serving and decorating, so spill out your creative juices (just enough not to butcher the dish)!
I hope this dish turns out successfully for you! Again, feel free to comment with questions or suggestions.
It's way harder than it sounds. "Eat healthy." And we know that we should eat healthy. We're quite well aware of that. Again, it's harder than it sounds. That dilemma where everything delicious is unhealthy? So true. See, taste depends on the person. It's an opinion. I may think that raisins are absolutely delicious, but you may disagree. So we can't really specify what's delicious or not. Just give opinions and take opinions.
Honestly, I eat anything I want. I'm not the fittest person in the world, but I like to think that I'm not unhealthy. Nonetheless, I have to improve. After discovering that I have a family history of diabetes and hypothyroid, I became a lot more strict with my dietary habits. If you haven't, please do the same. Always be aware of the risks you're putting yourself through. As I always say, obsession is worth ruining your health over.
Here, I have compiled my favorite ways to stay healthy (with this inseparable sweet tooth).
A spoonful of sugar makes everything better. Satisfy your cravings.
Low-Calorie Candy like SNAP infusion: You will find candies that only contain 90 calories per pack, and they're still pleasantly sweet and tangy. Again, taste is an opinion, so just go for any candy you prefer with low calories, and indulge. These types of candies are actually not hard to find. You can find them in your grocery stores.
Drinks that really taste like "the real deal": Flavored water always tastes like the real deal to me. It's that sweetness. That goods taste-bud lovin' sweetness. Also, as hard as it sounds, just stop drinking soda. No soda. Make it a habit. Always chose anything else other than soda. Soda has an immense amount of sugar, and is very unhealthy to consume on even a weekly basis.
Chocolate milk is so underestimated. It's nutrient-rich, sweet, chocolaty, and always has a low-fat version with the same delicious taste.
California raisins: Not all dried fruits are created equally. Sweetened dried cranberries can contain up to 40% added sugar, but raisins are just as sweet and chewy, with no sugar added. Plus, they pack a nutritional punch with their fiber, potassium, iron, and more . I just pop raisins in my mouth all day. It's something about that texture that makes me nuts (Bedwell, 2012)!
Smoothies: You can never go wrong with a good fruit smoothie with/without dairy products. Fruits are enough.
Banana Ice Cream: Not banana flavored ice cream. Ice cream made out of bananas. Try this: Freeze some over-ripe bananas, throw it in a food processor, and wham. Ice cream. Just top it with some maple syrup, or honey (healthier), and you can't taste the difference. It's amazing.
Pudding: It's basically milk.
Homemade lemonade/strawberryade: You can freeze these as popsicles or drink em up, and it'll be delicious!
Stick to sugar-free Gum (Lisa, 2010)
Frozen Yogurt: To this day, I haven't been able to tell the difference between frozen yogurt and ice cream. Top it with some fruits and nuts, and you have yourself a full-on dessert (Collie, 2011)!
Eat fruits in general: You'll get the sugar, but also the nutrients that also come along with it.
CookingLighthas a wonderful set of healthy dessert recipes you should definitely check out.
Other than that...
Try different techniques to satisfy your sweet cravings with healthy foods. You're still getting the sweet taste, but getting healthier foods.
Exercise: It's that word everyone hates. But you gotta do it. An amazing way to start off the exercise is by just walking. Just start walking at least 10 minutes a day, and increment it when you want to. Within no time, you'll never want to come back inside. To make time go by faster, bring a buddy or an MP3 with you. Eventually, you'll get to the point where you don't want the time to pass. This is a slow progressing exercise, but it has amazing results as the walker gets addicted simply to walking!
Eat Slowly: Believe it or not, eating slowly helps you reduce your intake. Also, as a sweet toother, you should already be eating slowly in the first place. You know, to let the flavors sink in. Moderation is key (Ahlberg, 2012).
Keep a diary of your sweet cravings. This will help you keep track of what/when to eat and and not eat. You'll feel better, and become a lot more organized with your plans, as well (Grieger, 2008).
It is very possible to be healthy and have a sweet tooth. You just have to be very responsible about it.
Today, I made my childhood favorite dessert, Shahi Tukra (Tukray for plural). It's an extremely rich and heavy dish, so make sure you eat it in small portions. It consists of fried pieces of bread dipped in water which has sugar, cardamom seeds, and saffron, and dipped in cream that has cardamom seeds. Of course, the cream part is optional. The flavors of saffron and cardamom seeds gently pat your taste buds, and the dish is fun to eat. It's soft on the outside, and crispy inside. Also, you can always impress your friends, family, or co-workers with such an exotic and delicious dish such as this one.
(Balachander, 2010)
Let's get started, shall we?
Ingredients
1 liter milk (any kind)
3/4 cup sugar
1/2 cup water
cardamom seeds
saffron
slivered almonds (optional)
pistachios (optional)
Supplies
1 non-stick pan
1 small pot to boil water
1 medium or large pot to boil milk
Instructions
Milk
Pour very little oil in the medium/large, and turn the heat up to medium.
Open up 2 - 3 cardamom seeds (depending on how strong you want the flavor), and pour in the little black bits inside. Do not pour in the unpeeled seed as it may cause choking. It is not edible.
Let it simmer a bit.
Pour in the milk and let it boil.
Keep stirring the milk as it's boiling and check for consistency. The milk should become thick and almost creamy.
Sweet Water
Add 2 - 3 unpeeled cardamom seeds in the small pot (they're will not be included in the dish. They're just to provide flavor in the water).
Sprinkle just a pinch of saffron.
Add in the sugar.
Add in the water.
Boil and the water will turn into syrup.
Do not be alarmed if the color appears yellow. It comes from the saffron and cardamom seeds.
Bread
Cut bread in to preferred sizes (this is done for eater-friendliness).
Add oil to the pan along with 2 unpeeled cardamom seeds.
Fry the bread pieces until golden-brown (I like to make them extra brown sometimes for extra crispiness).
Take out the bread pieces with anything that would let the oil slip back into the pan, and place the bread pieces on a paper towel (to soak in the remaining oil) in a plate or a dish.
Compile
Dip the bread pieces in the sugar water for at least 2 seconds (with the same utensil you used in step 4 inBread).
Optional: You can also dip the bread pieces inside the milk the same way.
Place them in a dish, and pour generous amounts of the milk on top of it.
Garnish with almond slivers and pistachios (anything you prefer, really).
And voila! This dish is usually eaten with a spoon (to enjoy the soupy milk) and a fork (to enjoy the crispy bread). It tastes delicious both hot and cold, but it isn't that great when it's room-temperature.
I hope this dish turns out successfully for you. Do comment for questions and suggestions. Again, this dish is a childhood favorite of mine, so I dearly hope that you will like it as well.
Cupcakes are irresistible. They're just little cakes! Genius. This video shows an amazing technique that combines two different mixes (brownie and strawberry cake) at once. Notice that she took consideration of timings of each of the mixes. Not to mention the beautiful decoration!
Video Source: Shabnam Amini
First, we need to make the brownie mix, and then the strawberry cake.
This is an interpretation on how I would make these cupcakes.
Making the Brownie
As I mentioned earlier in my blog, I will try to include as many accessible items as possible. To save some time and money, I will be using the regular pre-made brownie mix that can be bought for at least $3.99 at your local grocery store.
Ingredients:
Most of these will be written on the mixing box that contains the packet.
Brownie Mix Packet
2 Eggs
1/3 cup of oil
1/4 cup of water
Spray Canola Oil (You can also just use regular canola oil and dab into a cloth or a towel)
Supplies:
(All of these can be easily found in your local grocery store)
Oven
Cupcake tray
Cupcake cups/wrappers
Instructions:
Pre-heat the oven to the preferred temperature indicated on the mixing box.
Mix all of the ingredients into a bowl and beat until clumps are not visible.
Place the wrappers into the cupcake tray and spray oil very lightly. This is just so the cake doesn't stick to the wrapper. If you don't have the spray can, just dab the oil into a clean towel and lightly swipe inside the wrappers.
Remember, we only want half of the cupcake to be a brownie. Keep in mind that baking makes the cake rise, so fill in the brownie batter a little less than half in each wrapper.
Put the tray in the oven for about 8-10 minutes and remove the tray from the oven.
Notice that the brownie isn't completely done. This is because you will add cake mix on top of it, and bake it more.
Keep the oven on as a pre-heat for the next layer of the cupcake.
Making the Strawberry Cake
Again, I'm using just a grocery-store bought strawberry cake mix that would be at least $3.99 at your local grocery store. Also, you don't have to make the cake strawberry. You can always use the same instructions and replace the cake mix with another flavor.
Ingredients:
Most of these will be written on the box that contains the cake mix.
Strawberry (or any other cake mix you prefer) cake mix
3 eggs
1/3 cup cooking oil
11/4 cup of water
Instructions:
Mix all of the ingredients into a bowl and beat until clumps are not visible.
Fill in the cake mix a little below the top of each wrapper. If you notice that the cake mix is mixing inside the b
Place the tray into the oven for about 20 minutes.
Perform the toothpick test to check if the cupcakes are ready.
When ready, carefully remove the tray from oven and set aside.
The Toothpick Test
This is only to check if your baked goods are ready or not. All you have to do is poke in a toothpick inside your cake. If it turns out clear, it's done. If not, leave it in there for a little while longer. This trick works for everything that is baked. Very handy.
Serving and Decorating
Here's the fun part. Go all out. You can always buy cupcake frosting from your local grocery store. Pick a flavor of your choice that would best support the flavors of your cupcake. I used vanilla frosting and the taste turned out marvelous. Then again, I have an affinity for vanilla frosting.
Tip: If you want the frosting to be cold, before baking, remove the frosting from the container and put it into a bowl, and place it in the fridge. This will cool the frosting. Placing the frosting into the container makes it more flexible and gives it room to cool.
Technique
Applying the frosting can be extremely messy and frustrating, so here are some tips to get it on good.
Use a wide, flat knife.
Start from bottom to top.
Swipe the knife into the frosting cups and apply in a slashing motion all around the cupcake.
Spread out evenly to preferable texture.
Extras
In the video I linked above, Shabnam has used a Reese's Piece with frosting on it as a topping. If you want, go for it.
Sprinkles can always be found at your local grocery stores.
Have fun with it. Try sprinkling berries, chopped up fruits, candies, chocolate chips, or anything of your choice.
Give your cupcakes a theme for a specific occasion.
I hope this recipe turns out successfully for you! Cupcakes are a great way to bring people together and enjoy a delicious treat. They're also much more convenient. These double flavored cupcakes can be enjoyed by people of all ages.
Have fun!
Please feel free to leave any comments, questions, or suggestions.
I wonder how ecstatic the inventor of the first dessert must have been
when he tasted it. The Western World was not introduced to desserts until the
Middle Ages because sugar was not yet manufactured. Before that, the first
dessert was a crusty mixture of honeycomb and dried dates. People enjoyed fruits and nuts candied with honey.
In fact, the first extraction and refining of cane sugar was in India, in around 300 A.D (Powers, 2011).
Ice Cream
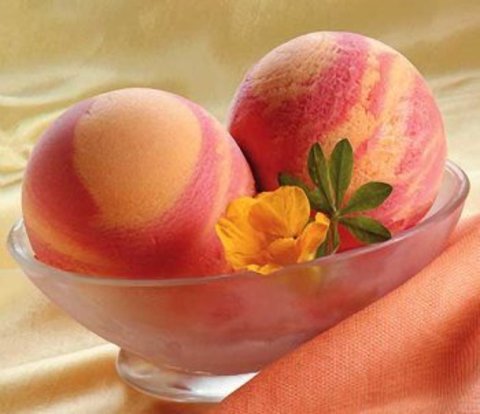
Ice cream was one of the first actual "desserts". Actually, it was just flavored ice that was invented by the Chinese around 3000 B.C., and Marco Polo brought the technique to Europe. This led to the first sherbet (frozen fruit juice with added milk, cream, egg white, or gelatin) by Catherine de Medici (Delp).
(Cabrera, 2010)
Vanilla
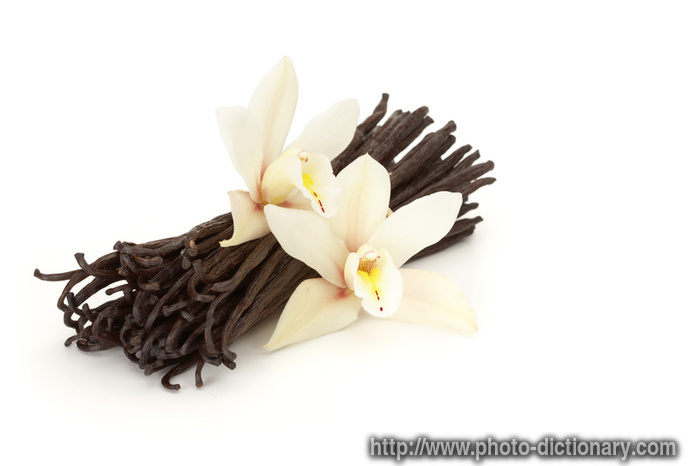
Vanilla is actually a substance obtained from vanilla beans found prominently in Mexico. Somehow the natives figured out that if you picked and "sweated" the pods, you would get vanillin, the famous fragrance in vanilla (Delp).
(CaFleureBon, 2012)
Filo Dough
I'm actually surprised that filo dough was invented so early as the 1300's. The thin pastry-paper was filled with nuts and fruits. Notice that baklava is very similar (Delp).
(Lynch, 2008)
Chocolate
Chocolate is made from the fruits of a cocoa tree, mostly located in Central America. For centuries, people drank chocolate rather than eating it as early as the 1,500 B.C. After the Spanish conquered Central America, they took the cocoa beans to Spain and drank them with hot water, and added and stirred sugar to make it sweeter, which made it foamy. In the late 17th Century, people began drinking it with milk to make the taste better. By 1674, England was eating chocolate as a food (Lambert).
(Delp, n.d.a.)
Sources:
Cabrera (2010, March 22). A Food Blog: Sherbet vs. Sherbert. Retrieved from http://onedaycafe.wordpress.com/2010/03/22/sherbet-vs-sherbert/
My name is Wajiha Desai and I love making desserts. Ever
since I was a toddler, I’ve had an irresistible sweet tooth. I still remember waking up to that mouth-watering
smell of my grandmother’s cookies every Saturday morning. In fact, the last
memory I have of her is of her teaching me to bake chocolate chip cookies. I
was seven years old. Since then, I’ve grown up to truly appreciate the
delicious and beautiful art that is making desserts.
I have previously held an assistant position in a small
bakery in a beautiful little hill-station town called Amravati in India. It was
one of the most exciting times of my life. The feeling of putting smiles on
people’s faces never gets old, especially when their smiles are the cause of
your own creation. To extend my culinary
abilities, I have taken many courses in preparing desserts. I also have a tremendous interest in making
desserts from different countries.
I’m looking forward to writing this blog because I will be
able to learn even more things about making desserts. For all of you sweet toothed novices, I plan
to talk about dessert recipes, providing you with amazing sources, videos, and
hopefully putting a smile on your face after you've created a successful dessert.
I plan to use easy-to-find ingredients
from local grocery stores so the supplies are accessible to everyone.
If you’re like me, having desserts can make your entire day.
Although it may not be a good thing as it can affect your health, but it’s an
easy way to become satisfied. As someone who has a sweet tooth, it’s important
for me to know my limitations. I definitely plan to talk about this in my blog.
No obsession is worth risking health.
Please feel free to ask questions, comment, and leave
suggestions in the comments section below.